Don't be fooled. Inside this thin coating of sweetness is a fiery core of total insanity.

Tuesday, November 29, 2011

A Review of Concrete Garden Projects from Timber Press

A little over a month ago, Timber Press sent me a free copy of their book Concrete Garden Projects: Easy & Inexpensive Containers, Furniture, Water Features & More by Malin Nilsson and Camilla Arvidsson. You may remember I featured a giveaway of this book that Timber Press was having on their website. The giveaway is all over, but I’ve been looking through the book and thinking about making some concrete ornaments for my garden based on the info in the book.


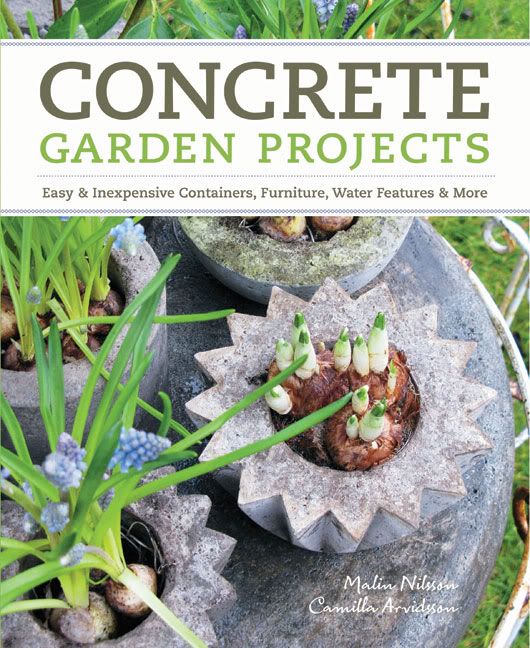
The book covers many projects -- everything from small pots, big pots, stepping stones, small water features, and birdbaths, to larger projects such as a concrete barbecue stand, a potting bench and a large water feature. It’s divided in two parts. Part One, which takes up about three quarters of the book,  tells about the various projects in general, talks about how to use them in the garden and shows photos of each finished project. Part Two, the final quarter of the book, contains detailed step-by-step instructions and photos showing exactly how to make each project.

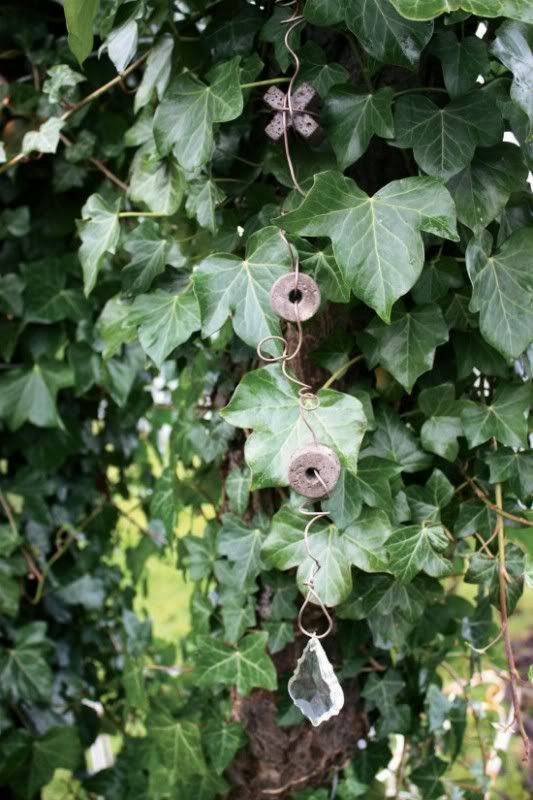
The book contains instructions for making this hanging ornament


I’ve wanted to use concrete to make garden ornaments for years now, but have never gotten around to it. There is something intimidating about it for me. This book might have been just what I needed to get going. It’s a good book with an informal, encouraging tone for beginners like me. But it has more complicated and creative projects as well, for those who have been working with concrete already.

Here’s an excerpt:

“There is a lot of beauty in nature, and forests provide a wealth of material for making impressions in concrete, like interesting leaves, twigs or any other foliage. Leaves from hostas, hollyhocks and maple trees make great stamps. Simple tiles like the ones with a leaf print here (these leaves were picked from a garden) will look good leaning against a tree, a fence or a shed wall. Place them in a flowerbed for plants to grow around them or try laying the tile flat and filling the leaf impression with water to make a small garden mirror.”

If you’re a creative gardener trying to figure out what to put on your want list for Christmas, this book would be a good start. Or, if you know gardeners who might like a small concrete ornament for Christmas, buy the book now and get busy!

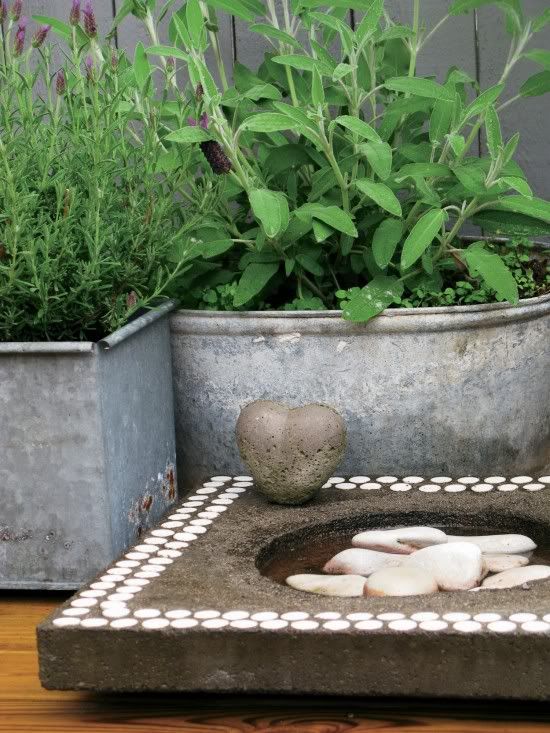
I really like this concrete birdbath with the galvanized planters!

I’m planning some time next week to make a project similar to the one in this last picture. Mine will be smaller. I’ve been gathering the materials for a couple of weeks now. If all goes well, I’ll write a blog post about it.


***********
Timber Press is a Portland, Oregon, publisher of books on gardening, ornamental and edible horticulture, garden design, sustainability, natural history, and the Pacific Northwest. They sent me the book for free, and didn't tell me what to say in my review. They didn't actually even require that I write a review.

Wednesday, November 23, 2011

A Thanksgiving Post With a Recipe

American Thanksgiving is tomorrow. I went out earlier this week and bought a turkey breast for me and Nigel. After putting it in to brine this morning, I went back out to the grocery store and bought that last couple of things that I always seem to forget (cranberry sauce, yes, the canned kind). I think for Christmas I am going to experiment with making my own from fresh cranberries. They grow right here in Washington. Here's a link to the recipe I'm going to try.

Whole Berry Cranberry Sauce

I've never been much of a baker at the holidays. I'm not one of those people who starts baking pies and cakes and cookies every day for a week before the holiday. I love to eat all that stuff, but making it -- not so much (good thing too, or I'd be even bigger than I am). I didn't do that even when my son was still living at home. But I do often try to make one new dessert recipe every year. So today I made an apple galette. (That sounds so much fancier than free-form apple pie, doesn't it?) I read some recipes online, and then I just kind of made this one up. It's very easy, because I used a ready-made pie crust. There's no reason why you can't make this with your own pie crust. It has apples, and not much sugar in it, so it's kind of healthy too, for a holiday dessert. (I am still trying to lose weight, but I'm not obsessing about it now that the holidays are here. I'm in a kind of steady-state, not losing, but not gaining either.)

Apple Galette

Preheat the oven to 450 degrees F. Take the ready-made crust out of the fridge and let it thaw for about 15 minutes on the counter. Peel two baking apples (I used Granny Smith).


Here's how I core apples. Slice the meat off one side of the apple, trying not to get any of the core.


Then do the same with the other side of the apple, which leaves you with a disk of apple and core.


Lay that disk flat and cut both sides off it, leaving the core. (Put the core and the peel in your compost.)

Sorry it's out of focus, but you get the idea.

Cut all the meat into slices, trying to keep them all about the same thickness.


Put all the slices in a bowl, and if you're worried about them browning before you get to use them, sprinkle them with a little lemon juice.

Line a cookie sheet or pizza pan with aluminum foil, and then roll out the premade crust.


Sprinkle some brown sugar and cinnamon on the apples and toss them in it.


Pile the apples in the center of the crust, leaving about 2-3 inches of clearance to the edge. If you want it to look more elegant, you can arrange the slices in a spiral, or a pattern of some kind. I prefer rustic, it's easier and quicker.

I'm going to fold the crust up over the apple slices, so to make sure I didn't poke any holes in the raw crust, I made a ring of apple slices with the rounded edges facing out, and then piled the rest in the center.

Fold the crust up over the apples.


Bake in the preheated oven for about 25 minutes, until it's nice and brown and flaky.


This is going to make four servings for tomorrow's dessert.


If you want to make this a little more complicated, you can brush the parts of crust that show with some egg or milk, and you can dot the apples with bits of butter too.

I'd like to wish everyone a Happy Thanksgiving!

Monday, November 21, 2011

SAGBUTT at the Volunteer Park Conservatory

This past Sunday, I met up with Paula, who writes Petunia's Garden, at the Volunteer Park Conservatory on Capitol Hill in Seattle. Paula and I are members of a group called SAGBUTT,  a loosely organized group of garden bloggers in the Seattle area that gets together once a month for a local outing. SAGBUTT stands for Seattle Area Garden Bloggers United To Talk. I missed the last two meetings, one because I had friends visiting from out of town, and the other because I wasn't feeling well. But on Sunday, which dawned very cold and frosty, but sunny, I made it into town.

The Volunteer Park Conservatory was built in 1912 and was fashioned after London's Crystal Palace. It's located on Capitol Hill in Seattle, in Volunteer Park, which was designed by John Olmsted and Frederick Law Olmsted, Jr. It is a Victorian glasshouse, manufactured in New York, shipped to Seattle and assembled by the Seattle Parks Department, at a now amazing cost of $5,000. The Conservatory is a historic landmark which is approaching its 100th anniversary. Its structural integrity has begun to fail over the years, and it is currently in the middle of a phased renovation process. The Conservatory works with the US Department of Fish and Wildlife as a rescue center for plants that have been illegally brought into the country (We didn't see any of those, I don't think they display them).


The Conservatory consists of five rooms or houses that represent five different growing environments -- The Palm House, the Seasonal Display House, the Cactus House (which was unfortunately closed, so no pictures), The Fern House and the Bromeliad House.

Well, I'll shut up now (mostly) and show you my photos. The first few are a bit foggy, the lens (and my glasses) fogged up immediately when I entered the building. It was warm and very humid inside.


There was a selection of beautiful orchids displayed in cages, probably to keep people from picking them. I managed to poke just the the lens of my little point-and-shoot camera through the openings for pictures.


There were a couple of enormous staghorn ferns on display.


The Fern House was a lesson in leaf texture and contrast.


This Epiphyllum oxypetalum was in a hanging pot. I had one several years ago, but it became too top-heavy and I ended up passing it along to another gardener back in Massachusetts.


This one had several buds, and looks like it's close to flowering. The flowers open only at night, and according to what I've heard, they can perfume a large area.


There was an interesting selection of very poky bromeliads.


I thought these looked like critters that could be crawling across the ocean floor.


The Seasonal Display managed to be evocative of autumn foliage, while not actually using any autumn leaves.


For a wonderful account of a 2011 summer visit to the Volunteer Park Conservatory, please visit a blog from Portland gardener Ann Amato-Buttitta, called The Amateur Bot-ann-ist.

Volunteer Park Conservatory (Seattle): Part One, The Seasonal Display House 

Volunteer Park Conservatory (Seattle): Part Two, The Cactus House 

Volunteer Park Conservatory (Seattle): Part Three, The Palm House 

Volunteer Park Conservatory (Seattle): Part Four, The Fern House

Volunteer Park Conservatory (Seattle): Part Five, The Bromeliad House